

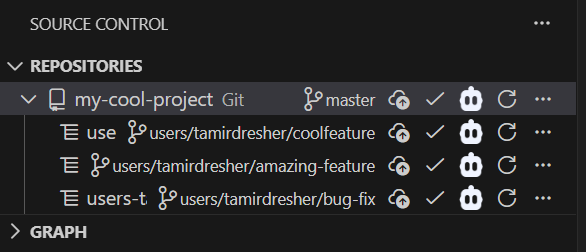
During the Microsoft Global Hackathon 2025, my team faced a familiar challenge: too many features, too little time. I had to work on multiple features simultaneously but you can’t really do it in the same folder where you cloned your repo and creating multiple clones by yourself is cumbersome and hurts productivity. That’s when I discovered a game-changing technique: using Git worktrees to create a virtual AI development team, with each agent working on a different feature in parallel.
The result? I had multiple AI code agents working simultaneously on different features, each in their own workspace, while I supervised the entire team like a tech lead reviewing pull requests. It was like having a team of developers working on your machine at the same time, without the overhead of managing multiple repository clones.
The Problem: Context Switching is Killing Productivity
When you’re working on multiple features, the traditional Git workflow forces you to constantly switch branches. This means:
- Stopping your current work
- Committing or stashing changes
- Switching branches
- Waiting for your IDE to reload
- Getting your AI agent back in context
- Repeating this dance every time you need to work on something else
With AI code agents like Roo, GitHub Copilot, or Cursor, this problem gets worse. Each time you switch branches, you lose the context your AI agent has built up. You’re essentially resetting your assistant’s understanding of what you’re working on.
Enter Git Worktrees: Your AI Team’s Secret Weapon
Git worktrees solve this problem elegantly. Instead of one working directory, you can have multiple directories, each checked out to a different branch. Git handles all the complexity of keeping everything in sync - you just work in separate folders.
Why is this better than cloning the repository multiple times?
- Shared Git history: All worktrees share the same
.gitdirectory, so commits and branches are instantly available everywhere - Smaller disk footprint: You’re not duplicating the entire repository
- Seamless integration: Git handles the coordination between worktrees automatically
- VS Code native support: Visual Studio Code has built-in worktree management
The Power of Parallel AI Agents
Here’s where it gets interesting. Once you have multiple worktrees:
- Open each worktree in its own VS Code window
- Launch a separate AI code agent in each window
- Give each agent a specific task to work on
- Switch between windows to supervise progress
You can even mix and match AI tools! During the hackathon, I used Roo in VS Code for feature development and GitHub Copilot in Visual Studio 2022 for debugging, because Copilot’s integration with the Visual Studio debugger is exceptional.
It’s like having a distributed team working on your local machine, where you’re the tech lead reviewing and guiding the work.
Step-by-Step: Setting Up Your AI Agent Team
Let me show you exactly how to set this up in VS Code.
Step 1: Show the Repositories View
First, you need to add the Repositories view to your Source Control area in VS Code.

- Open the Source Control panel (Ctrl+Shift+G)
- Click the three dots (•••) at the top
- Look for “Repositories” in the Views submenu and enable it
Step 2: Access the Worktrees Menu
Once you have the Repositories view visible, you can access worktree management.
- In the Repositories view, find your repository
- Click the three dots next to your repository name
- Navigate to “Worktrees” in the context menu
Step 3: Create a Worktree
Now you’re ready to create your first worktree!

Click on “Create Worktree” from the worktrees menu. This will start the worktree creation wizard.
Step 4: Select or Create a Branch
You’ll be prompted to choose a branch for your worktree.

You can either:
- Select an existing branch that you want to work on
- Create a new branch for a new feature or bug fix
Choose the branch that corresponds to the feature you want your AI agent to work on.
Step 5: Choose the Worktree Location
Next, specify where the worktree will be created on your filesystem.

Usually you keep all worktrees in a folder with the name of the repo and ‘.worktrees’ suffix.
This keeps everything organized and makes it easy to see what’s being worked on.
Step 6: Open in a New Window
Once created, you can open the worktree in its own VS Code window.
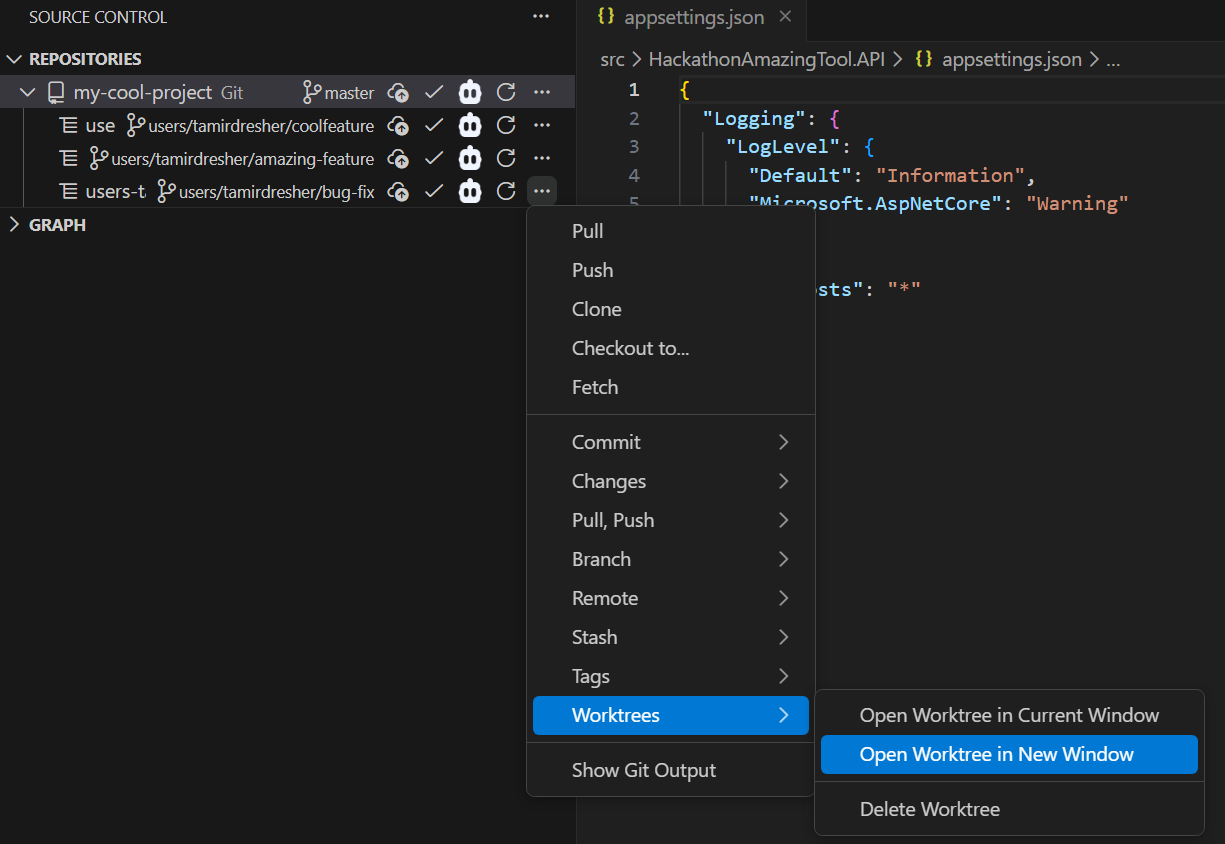
Click on the three dots next to the newly created worktree and select “Open in New Window”. This gives you a completely separate VS Code instance for this branch.
Step 7: Repeat for Each Feature
Create a worktree for each feature or bug fix you need to work on:
- Feature branch → Worktree → VS Code window
- Bug fix branch → Worktree → VS Code window
- Experiment branch → Worktree → VS Code window
Step 8: Deploy Your AI Agent Team
Now comes the magic:
- In each VS Code window, start your AI code agent (Roo, Copilot, Cursor, etc.)
- Give each agent a clear task: “Implement authentication”, “Add API endpoints”, “Fix bug #123”
- Switch between windows to monitor progress
- Review and guide each agent like you would review a team member’s work
- Commit and push when satisfied with the implementation
- Have multiple agents working in parallel
Real-World Benefits
During the hackathon, this approach gave me several concrete advantages:
No Context Switching: Each AI agent maintained full context of its specific task. When I needed to check on the authentication feature, I just switched windows - no branch switching, no reloading.
Parallel Development: While one agent was working on the API layer, another was implementing the UI components. Features that would have taken sequential work happened in parallel.
Different Tools for Different Jobs: I used Roo for rapid feature development because of its excellent code generation, and Visual Studio with Copilot when I needed to debug complex issues, leveraging the deep IDE integration.
Easy Progress Review: I could quickly Alt+Tab through windows to see the state of each feature, like doing standup with multiple team members.
Clean Branch Management: Each worktree was isolated. If one feature needed to be abandoned or drastically changed, it didn’t affect the others.
Have you tried using Git worktrees with AI code agents or have other tips to share? I’d love to hear about your experience in the comments below!