When we create applications we usually want to make them easy to use by our users. One way to make application more accessible internationally is to make it localized to the users’ language and regional settings.
In this post I wish to show how to add localization support to your WinRT C# application.
All the source code can be downloaded from my GitHub: https://github.com/tamirdresher/LocalizedWinRTAppExample
Sample App
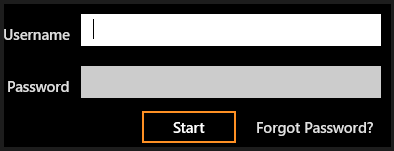
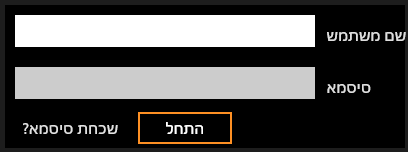
I created a simple application that includes a simple login page (the app includes only UI) and currently supports “en-US” and “he-IL” locales
English version | Hebrew version |
How does it work?
Create a new Windows Store project – I used the Blank App template

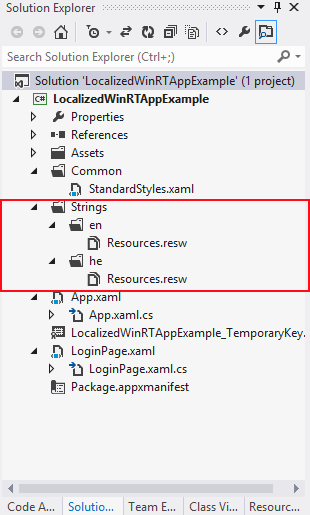
In the project Add a directory called “Strings” that includes sub directory for every locale you wish to support.

Each sub directory needs to contain a *.resw file (or more) with the localized values.
In the XAML file we need to give each element that is localized a
x:UID unique
value.
e.g.
<!–username textbox–>
<TextBlock x:Uid=”UsernameCaption”
Grid.Row=”0″
Grid.Column=”0″
Text=”Username”
HorizontalAlignment=”Right”
VerticalAlignment=”Center”
Style=”{StaticResource TitleTextStyle}” />
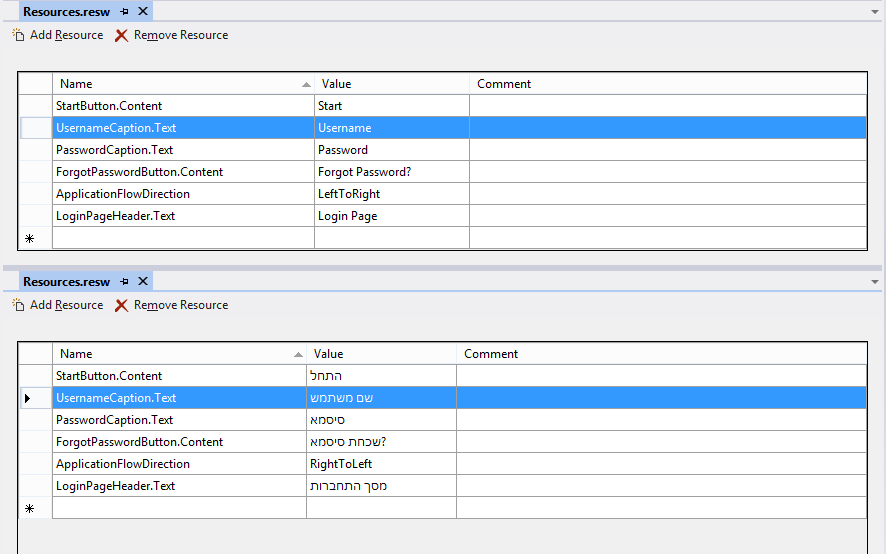
Later, in the *.resw files we define the appropriate value for each localized property

That’s all you need to do in order to make that UI element localized.
Note that this doesn’t end with Text value but we can control any property on the element such as width, height etc.
Flow Direction
Since different languages use different layout ordering (RTL, LTR), we need to add this behavior to our application.
One way to achieve this is by setting the FlowDirection property (from a value in our .resw file) for each of our views but that error-prone and cumbersome.
Instead we can add code for our application initialization that put the FlowDirection on the rootframe and since the FlowDirection is an inherited value, all the other views will have the same FlowDirection.
This code snippet achieves that goal:
var loader = new Windows.ApplicationModel.Resources.ResourceLoader();
var flowDirectionString = loader.GetString(“ApplicationFlowDirection”);
var flowDirection = FlowDirection.LeftToRight;
FlowDirection.TryParse(flowDirectionString, true, out flowDirection);
rootFrame.FlowDirection = flowDirection;
in the attached example application the code is located in the OnLaunched event handler of the App class so that when the application starts the initialization it looks for the resource “ApplicationFlowDirection” (which contains the value RightToLeft or LeftToRight) And if it finds it then changes the root frame FlowDirection.
Otherwise, the FlowDirection is LeftToRight
Testing the Localization
In order to see how the UI changes for different locales, I’ve added a code (that runs only in debug mode) where u declare the current locale – default is en-US
#if DEBUG
var locale = "en-US";
//var locale="he-IL";
Windows.Globalization.ApplicationLanguages.PrimaryLanguageOverride=locale;
#endif


